
Explore the effortless process of crafting your DIY pom pom rug with our easy-to-follow guide. With just a few basic materials and simple techniques, you can create a fluffy masterpiece to adorn your home. Follow along as we walk you through each step, from making pom poms to assembling the rug. Whether you’re a seasoned crafter or new to DIY projects, this tutorial is sure to inspire creativity and add a touch of cozy charm to your space.
Get ready with the necessary materials and tools for crafting your DIY pom pom rug
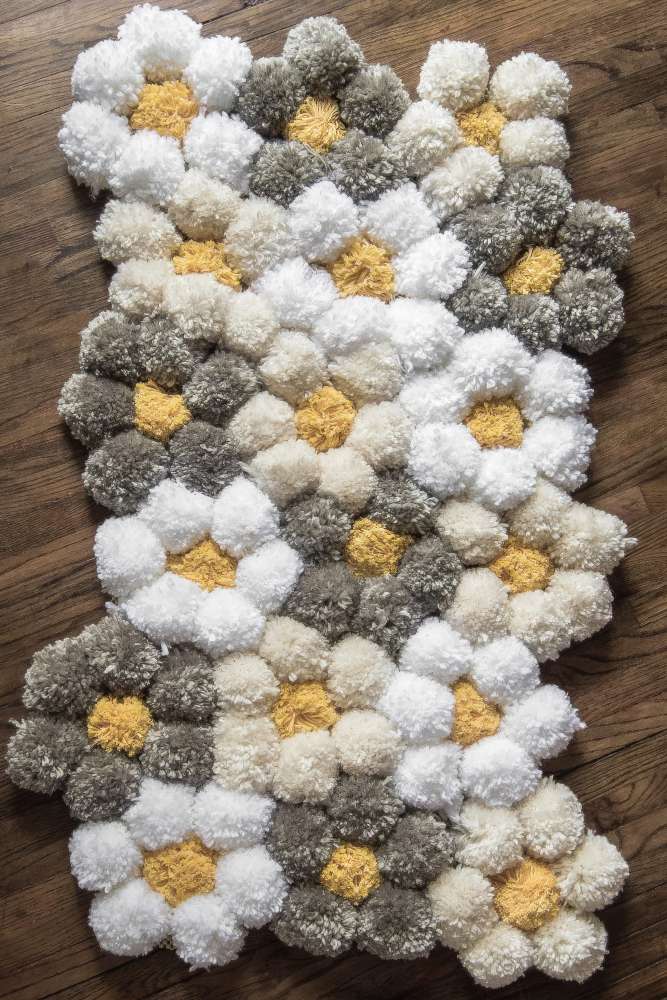
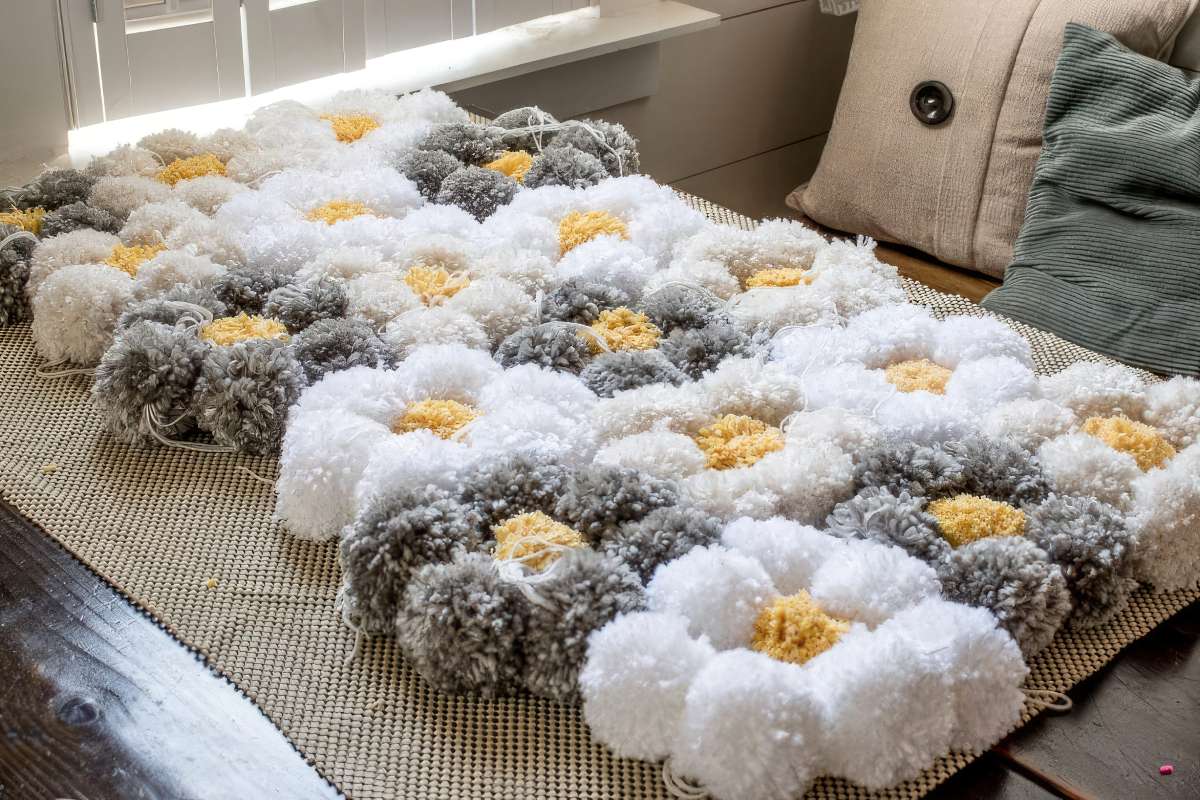
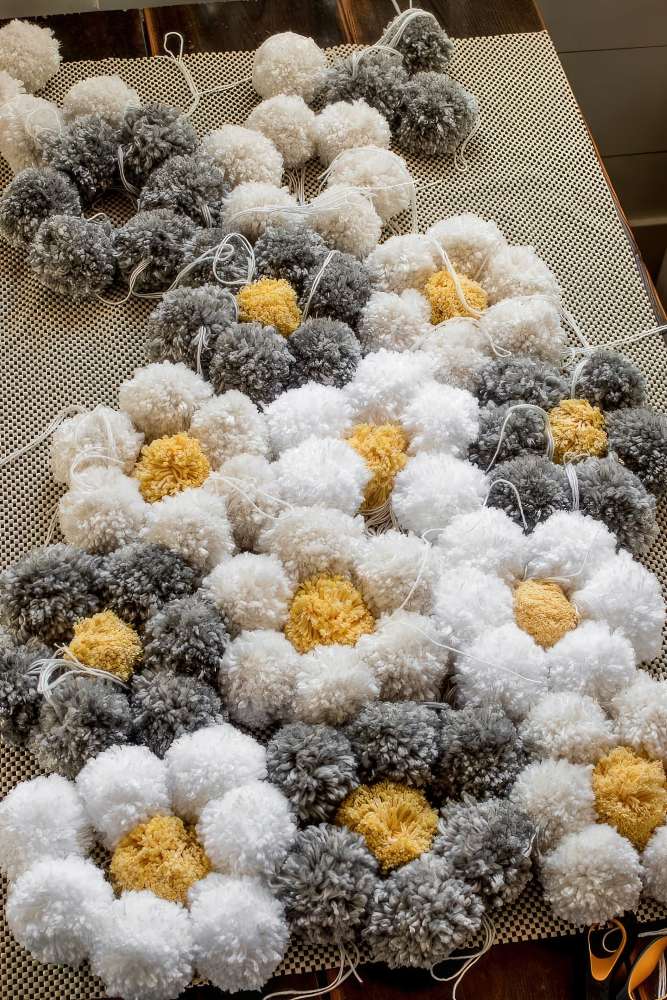
For my rug design, I opted for a floral pattern. To ensure this pattern stands out, I selected three distinct colors of yarn and utilized yellow yarn for the centers of the flowers. While any color could complement the rug mat, it’s essential to note that using a single color may result in a polka-dot appearance rather than distinct flowers. Therefore, having a variety of yarn colors is crucial for creating borders and contrasts.
Additionally, I decided to incorporate cotton yarn for the flower centers to provide a contrasting element against the rest of the rug. The cotton pom-poms serve as the focal points resembling flower centers.
Materials
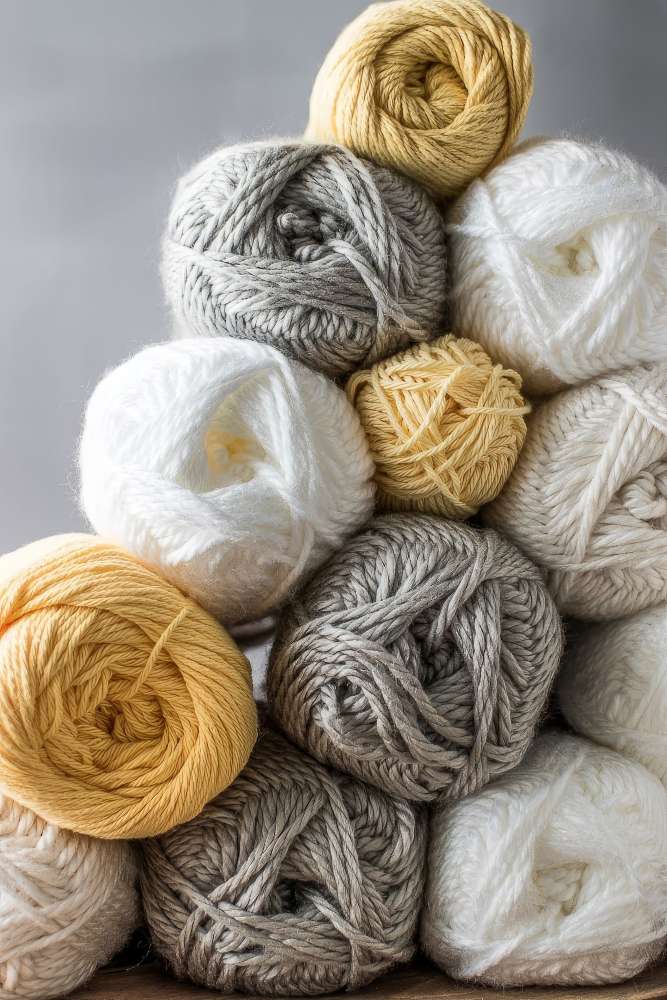
For my 24″ x 42″ sized rug, I used 15 skeins of yarn. Here are the materials you’ll need for your pom pom rug project:
- Four skeins – White
- Four skeins – Grey Heather
- Four skeins – Natural
- Two skeins – Yellow
- One skein of Yarns Cotton Fair Solid Yarn – White
- Area Rug Pad (5×7 feet)
Note: While a 5×7 feet rug pad was used for this project, a 4×6 feet size would suffice. It’s essential to ensure the rug pad has the right honeycomb size for optimal results, although a suitable 4×6 feet size may be available.
Tools
You’ll also need:
- Scissors
- Large Pom-Pom Maker: A set of 2 large pom makers was used for this project, with the 2.5-inch size specifically chosen.
Using a pom-pom maker is optional; however, it can significantly expedite the process and save you time.
How to make a pom rug with the right yarn
So, what’s the suitable yarn to use?
Well, it varies based on the desired look and your level of patience. Thin yarn will significantly increase the time required for DIY pom pom making, while thick yarn may not produce the desired aesthetic.
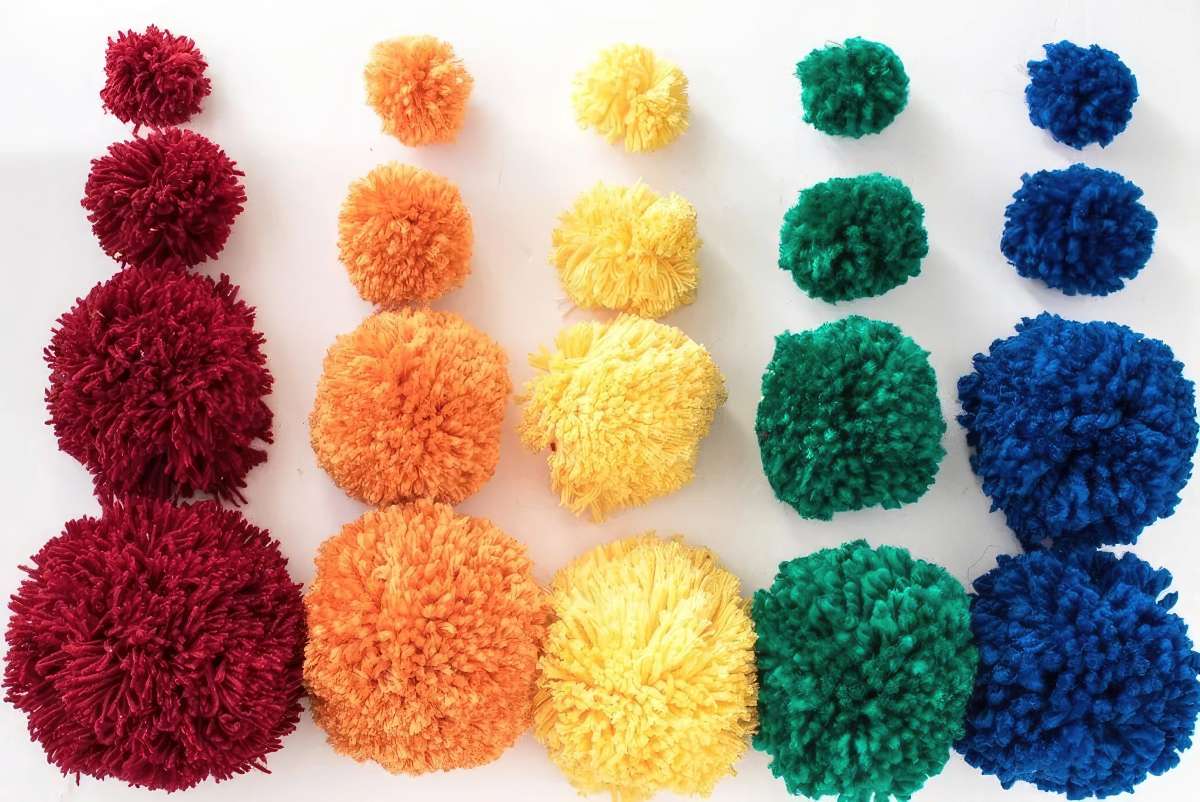
I opted for a middle ground approach by selecting a bulky-thickness yarn (size 5), which would yield a beautifully fluffy appearance while also expediting the pom pom-making process. When using chunky yarn, keep in mind that it will result in a high-pile rug that may be challenging to walk on. Therefore, I recommend choosing a wool yarn ranging from very thin to mid-sized for this project.
How many fluffy pom poms are required to complete this rug?
For this project, you’ll need 15 skeins of yarn and approximately 125 pom poms.
I aimed for a rug that could fit under my desk to keep my feet warm during the winter, so I opted for a slightly smaller size. To create the pom poms, I used one of the large clover pom makers, which produces pom poms around 2.5 inches in diameter—the perfect size for this rug.
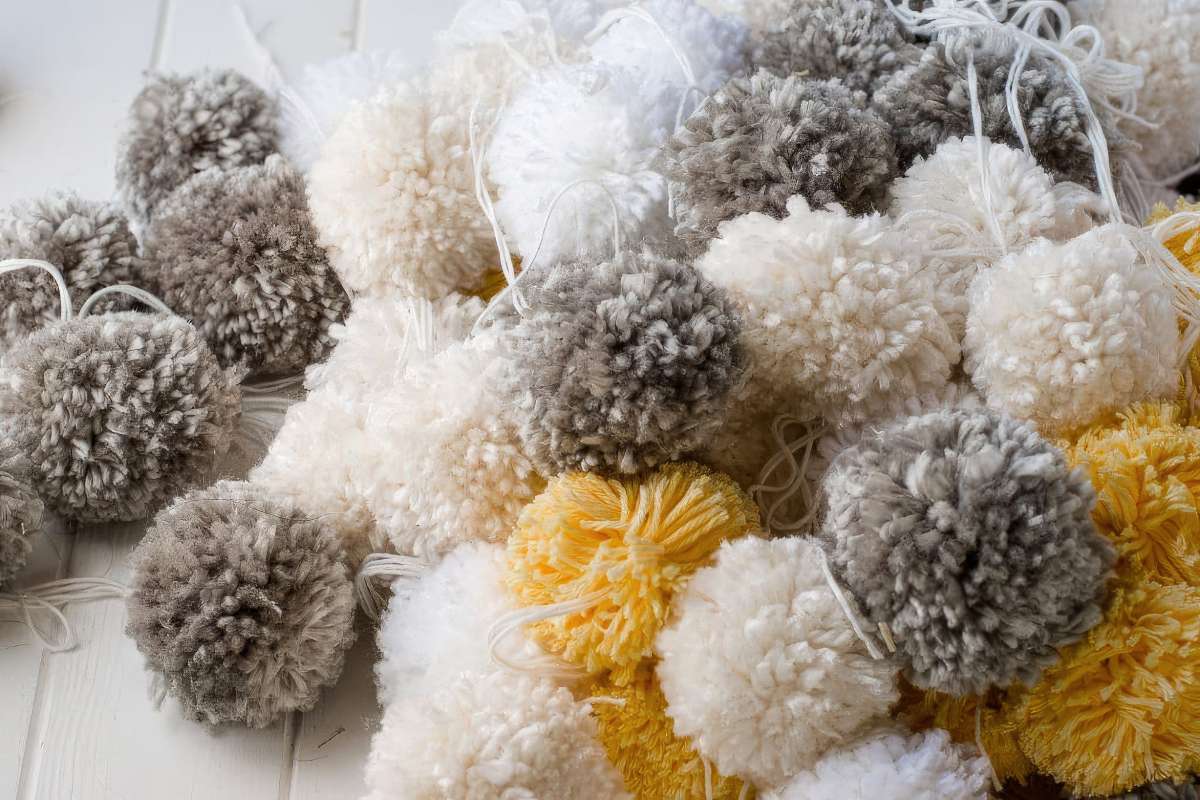
Each skein of this yarn yields approximately nine pom poms when using a 2.5-inch pom maker.
A helpful tip: When making the pom poms, cut a long piece of string and double it up to wrap around the center. Leave the string tails long when trimming the pom poms, as these will be used to attach the pom poms to the rug backing. Doubling up the string helps reinforce the pom poms and prevent them from falling apart.
So, what’s the secret to crafting this pom pom rug quickly?
These pom pom makers are efficient and sturdy, eliminating the need for complex adjustments or the creation of replacement templates. They are durable, providing long-lasting use, and can complete the task quickly. Given their affordability, I highly recommend investing in one, especially for larger projects requiring extensive pom pom making.
Another time-saving technique is to wind multiple strands of yarn simultaneously, particularly if you have multiple skeins of the same color. I personally used four strands at once and could complete a pom pom in just two and a half minutes. This method significantly outpaces the time it takes to wind a single strand repeatedly around the pom pom maker.
Lastly, it’s essential to ensure your scissors remain sharp throughout the project. If you notice them starting to stick while trimming pom poms, simply wipe the scissor blades clean with a soft cloth every few pom poms. This maintenance tip will ensure your scissors continue to function smoothly, just like new ones.
Here are some tips for making pom poms:
Tip #1: Utilize a pom pom maker to expedite the process significantly. Alternatively, if you don’t have a pom pom maker, you can use toilet paper rolls or cardboard tubes as substitutes, functioning similarly to a pom pom maker without the need to purchase one.
Tip #2: Wind multiple strands of yarn simultaneously to accelerate the process.
Tip #3: Ensure you have a very sharp pair of scissors for trimming your pom poms.
Tip #4: This project presents an excellent opportunity to utilize leftover scrap yarn from previous projects. Creating a rug with variously colored flowers at different levels can yield a charming result. If time permits, consider making one using your scrap yarn—it’s sure to be adorable.
Which backing is most suitable?
After exploring various options, I found that the honeycomb-style rug backing proved to be the most effective choice. Not only does it provide anchor points for attaching the pom poms, but it also offers padding and a non-slip surface. Given the soft texture of the yarn used, it’s prone to slipping on the floor. Utilizing a non-slip backing helps prevent this issue. Additionally, there’s no need for an additional rug pad, as the rug backing serves this purpose by preventing slips.
For added reinforcement, consider adding a second layer of rug backing. If you opt for this approach, I recommend hand-sewing the second backing to the first in X patterns across the back. This extra layer will enhance the durability of your DIY rug and extend its lifespan.
Instructions for attaching the pom-poms to the backing
After completing the pom-pom making and trimming process, it’s time to plan out your rug design.
To begin, lay out your rug backing on a table and arrange your pom-poms into flower shapes according to your desired design. This step may require some adjustment and experimentation to achieve the desired layout. For this daisy pom-pom rug, there is no specific pattern to follow. Simply distribute the flower colors evenly across the rug backing.
To attach the pom-poms to the rug backing, use the long string tails attached to each pom-pom. Thread these tails through the holes in the rug backing and secure them by tying them off. It’s recommended to tie them twice to ensure they remain firmly attached.
Once all the pom-poms are attached, flip the rug over and trim off any excess backing to complete the project.
Take care of your DIY pom pom rug
You can indeed wash your rug, but there are a few precautions to take:
- Ensure you use acrylic yarn or a washable material for your DIY rug.
- When making the pom-poms, wrap the tie string around at least twice and tighten it securely to prevent unraveling during washing.
- Tie the pom-poms to the rug backing securely, preferably with double knots, to ensure they stay in place.
- Before washing, place the rug in a protective covering such as a king-size pillowcase, lingerie bag, or duvet cover to prevent it from moving around too much. Secure the covering to keep it in place.
- Lay the rug flat to dry, similar to how you would dry a sweater.
The longevity of your rug depends on the care you provide. Taking these extra steps during the making process, such as doubling up tie strings and securely tying down pom-poms, will contribute to its durability.

Here’s what you should be aware of when making this rug
Pom pom rugs offer luxurious fluffiness and warmth, making them a cozy addition to any space. However, it’s essential to note a disclaimer about these DIY rugs.
The centers of each pom pom tend to be relatively hard. The fluffier the pom poms and the tighter they are tied off, the harder they become. While the exterior of the pom pom remains soft and fluffy, the interior can feel as hard as a small marble. As a result, walking on these rugs may be slightly uncomfortable. While they add vibrancy to a room, they may not be suitable for high-traffic areas like bathroom rug pads, which require frequent washing to maintain their appearance.
To mitigate this issue, you can opt for less fluffy pom poms, although this may compromise the rug’s overall aesthetic appeal. While sitting or lying on the rug is comfortable, walking on it may not be as pleasant. For instance, a rug made to keep feet warm under a desk is ideal for this purpose, serving as a cozy spot to rest rather than for frequent walking.
Check out our DIY tutorials in the Handcrafts category here

Make a foam bunny with our DIY craft tutorial
Delicious cabbage and ham salad recipe


