
These bunnies with paper handprints are incredibly easy to create, and they are absolutely adorable! You can craft these bunnies using construction paper, colored printer paper, or even plain white paper if you’re running low on supplies.
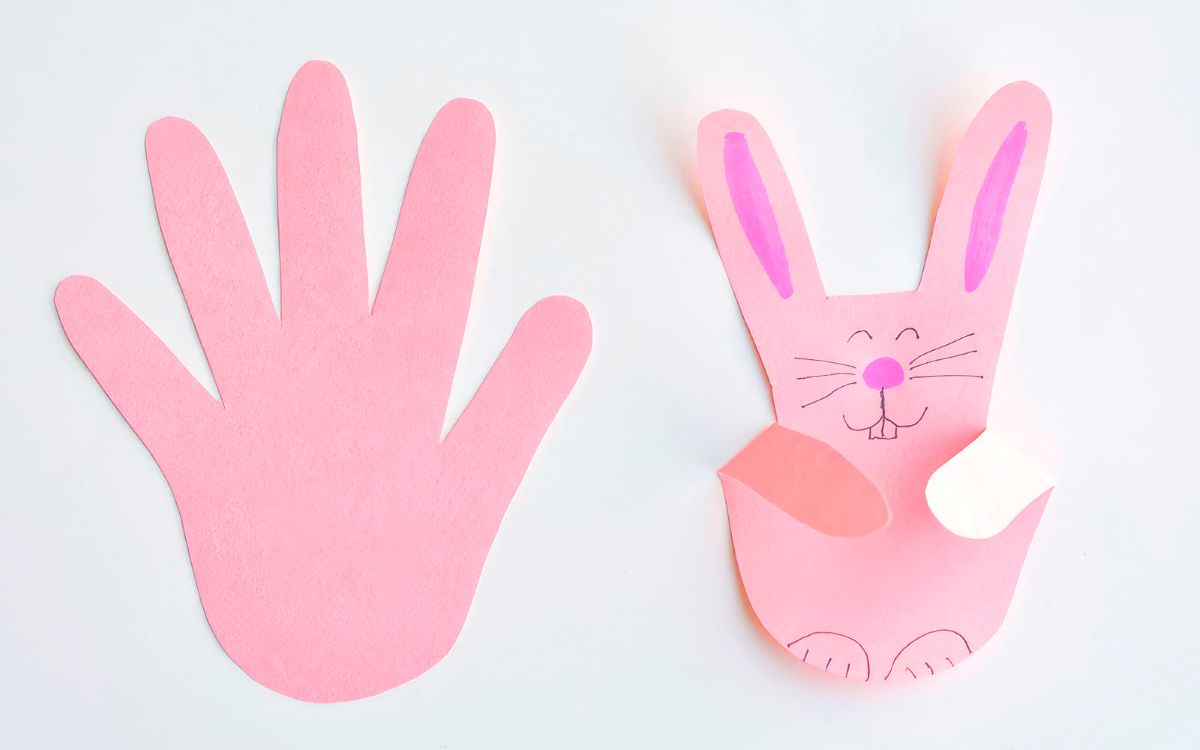
Bunnies with paper handprints is ideal for Easter day
This Easter craft is incredibly straightforward and perfect for creating with kids – and the best thing is, you likely have all the necessary supplies at home already. All you need are some paper, scissors, and a few pens, markers, or colored pencils – that’s it! This craft is straightforward, quick to complete, and absolutely adorable once finished.
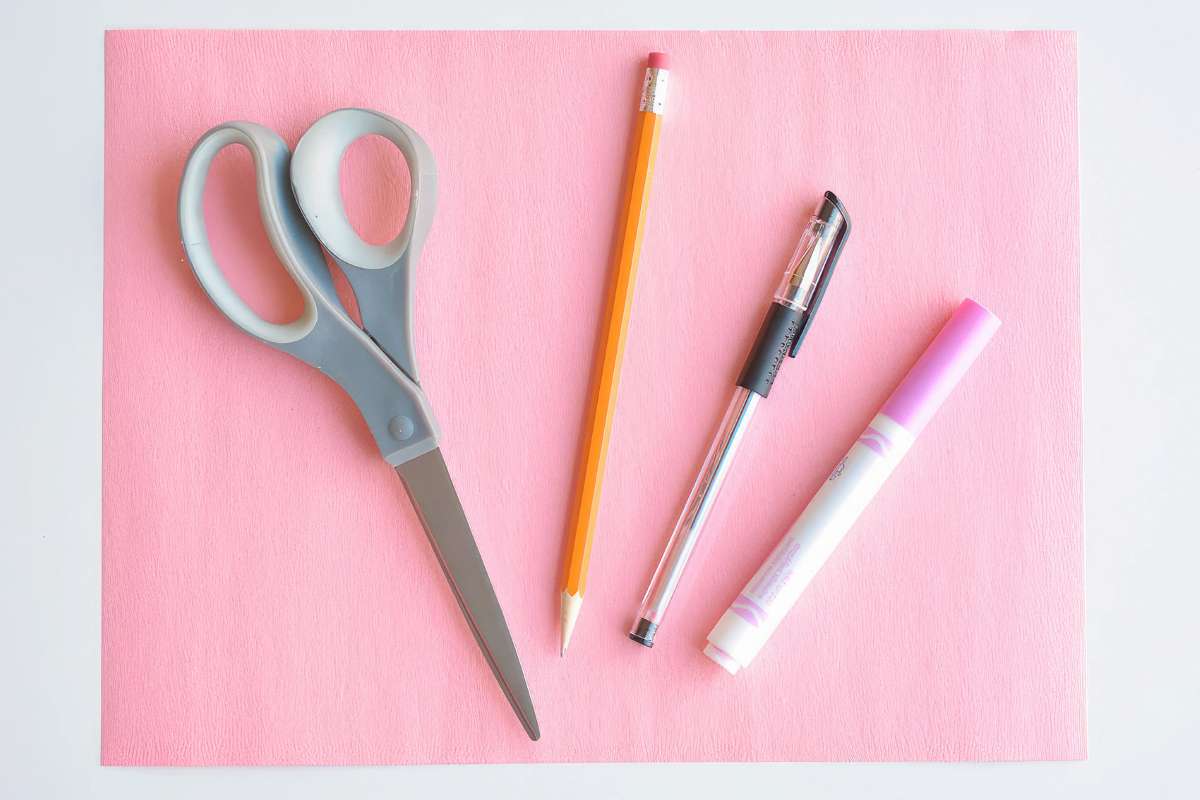
Here are the materials you’ll need:
- Construction Paper
- Pink Marker
- Black Gel Pen and or a pencil
- Scissors
This bunny craft is perfect for those with limited craft supplies! While we utilized construction paper, any type of paper will suffice.
How to draw a bunny face
Feel free to customize your Easter bunny’s face to your liking! Here are five facial expressions I’ve created (refer to the photo below). When drawing the faces, think about your favorite emojis. You can create happy, surprised, excited, sad, angry, or confused bunnies. You might even want to add heart eyes.
I prefer using a black gel pen for drawing the faces, but any pen, pencil crayon, or marker will do the job.

How to create paper handprint bunnies
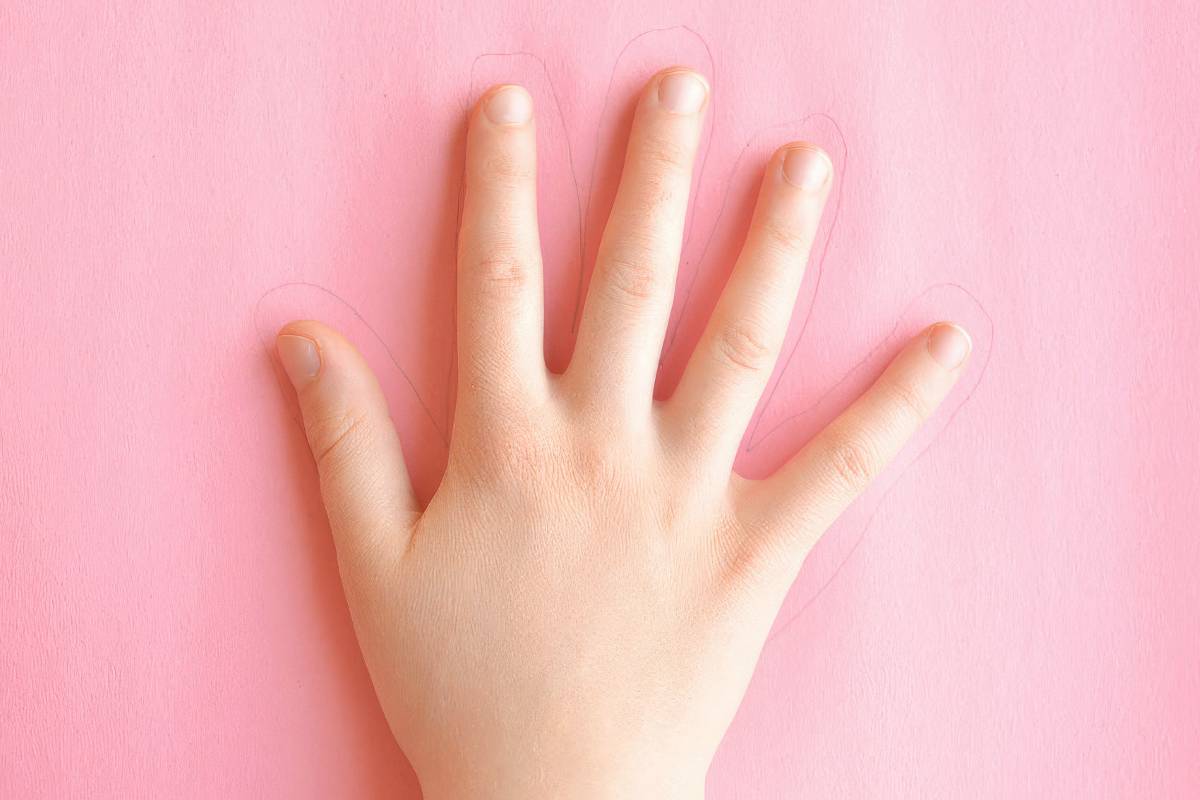
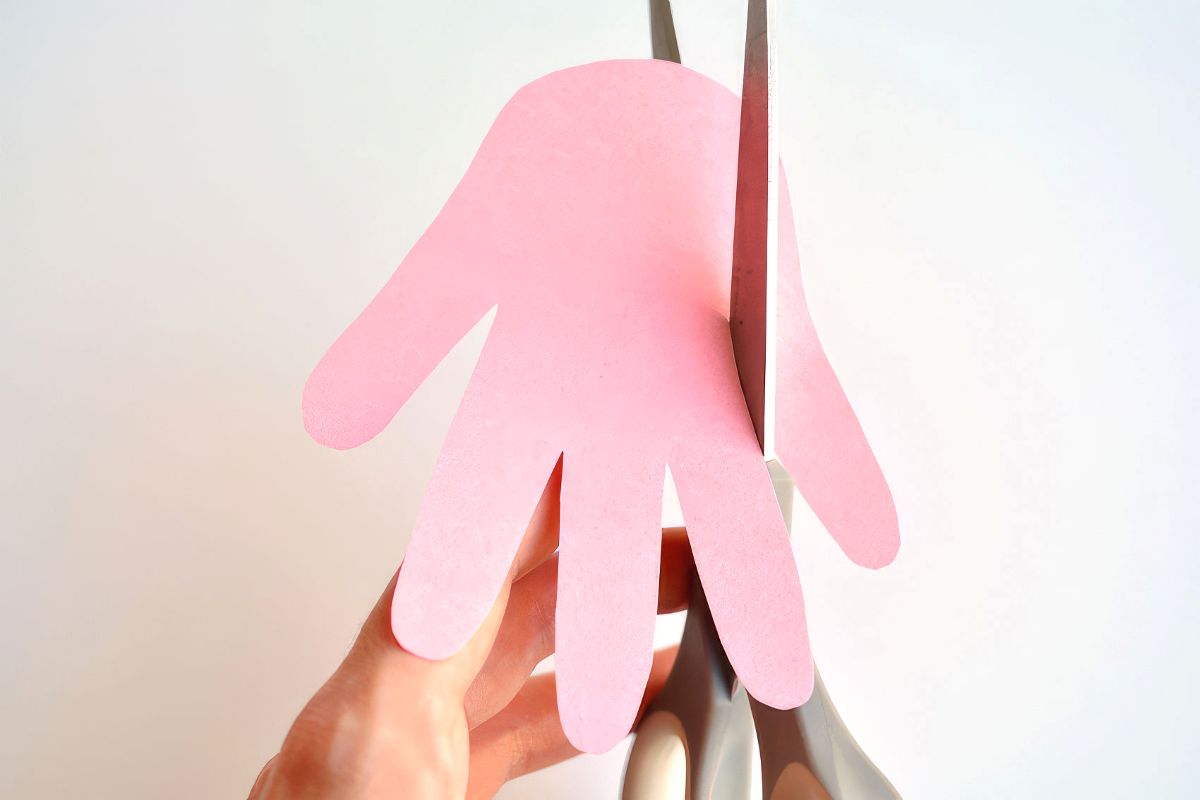
Step 1: Begin by tracing a handprint, ensuring it’s slightly wider than usual. Avoid tracing tightly around the fingers to prevent the ears and arms from being too skinny. Refer to the photo below for guidance, aiming for a handprint that’s thicker than the actual fingers. You can also watch the video above to see how I traced the handprint.
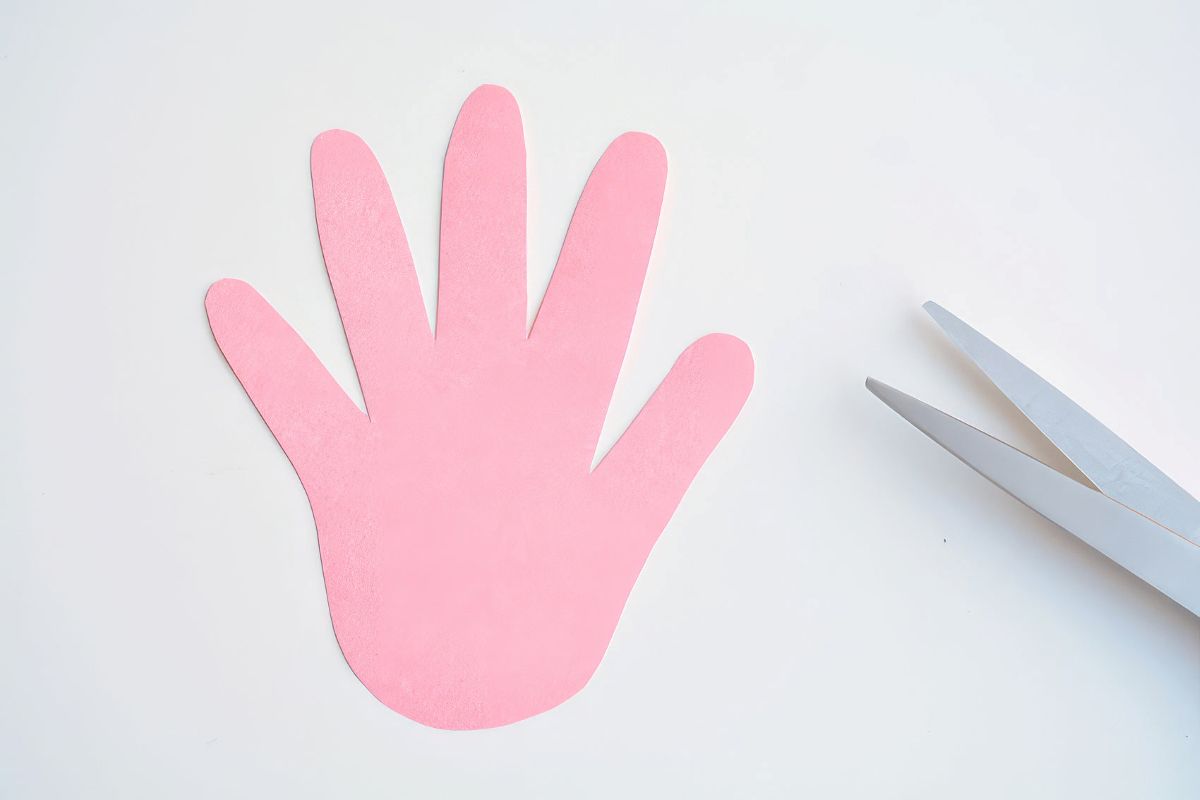
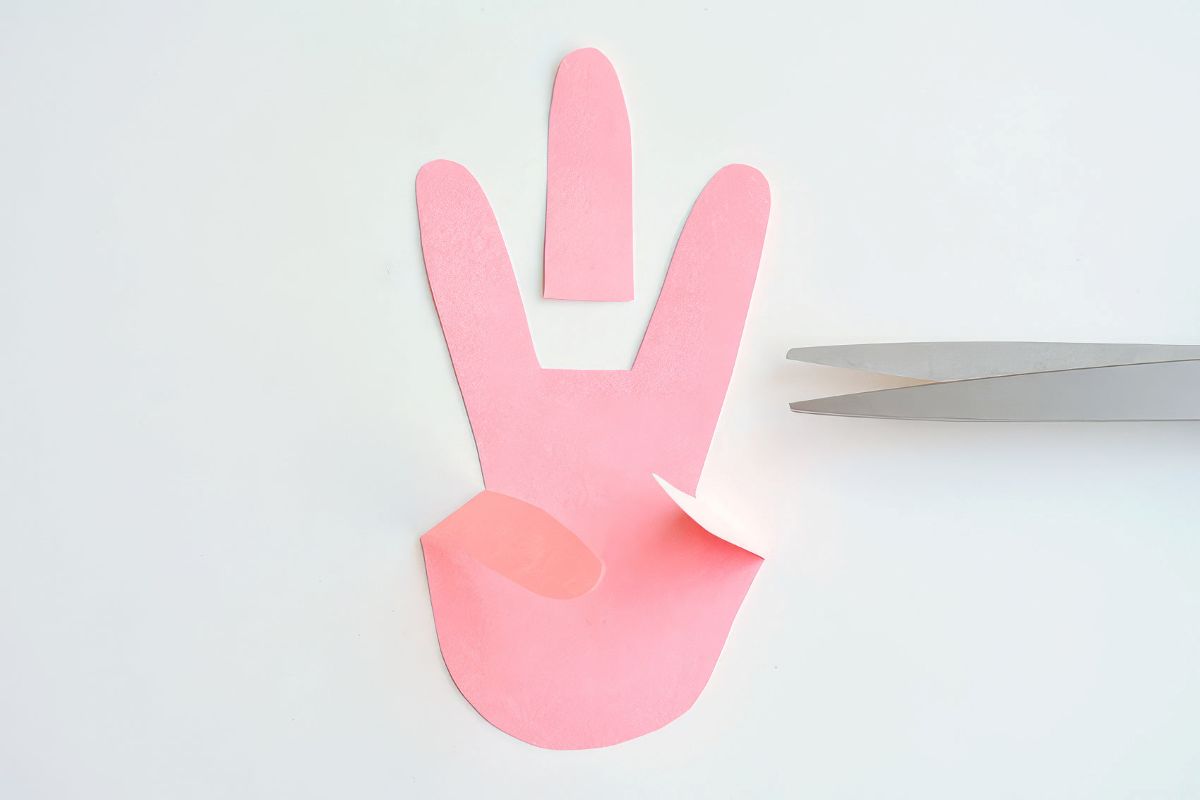
Step 2: Cut out the handprint, ensuring there’s a V-shape at the bottom between each finger, rather than a curve.
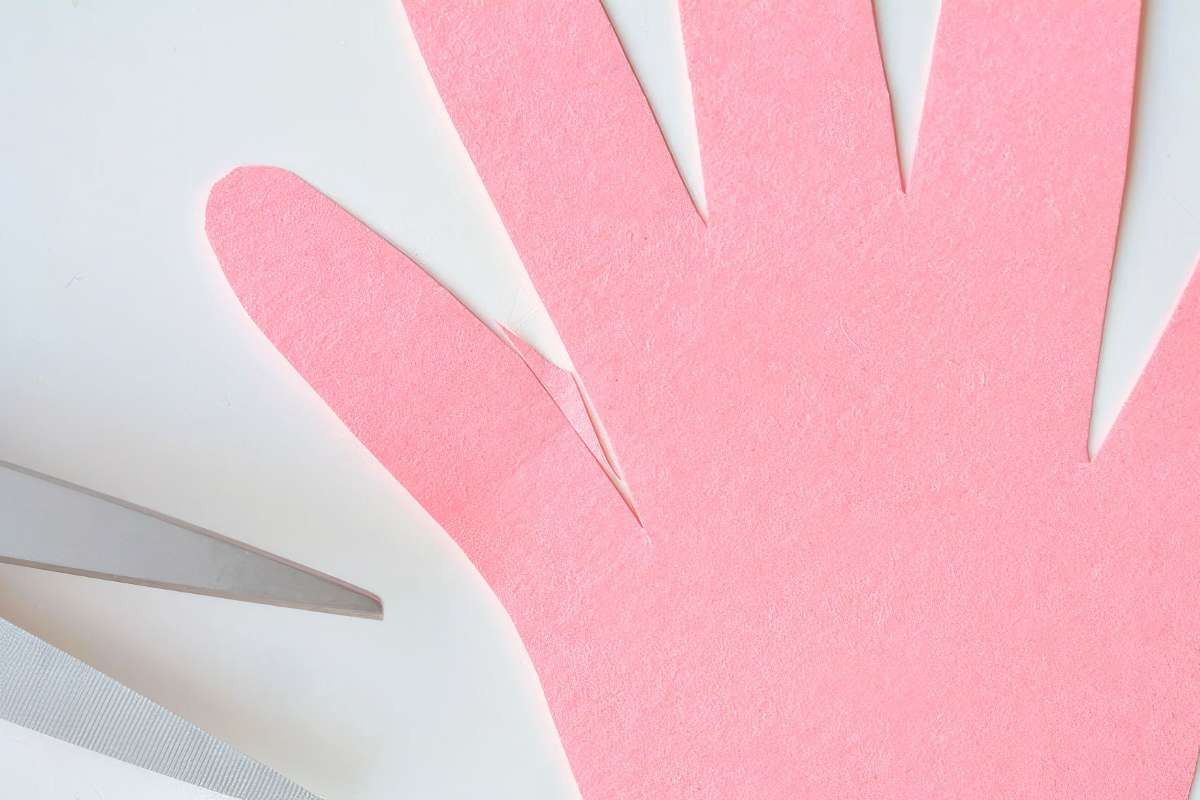
Step 3: This step is optional, but highly recommended for achieving better proportions. Cut a small slit beside the pinky finger, ensuring that the bottom of the cut aligns with the bottom of the space beside the thumb.
Step 4: After cutting the slit, the baby finger may appear slightly crooked. Feel free to trim the baby finger slightly to adjust its shape and ensure it looks neat.
Step 5: Next, fold down the baby finger towards the center to create one of the bunny’s arms.
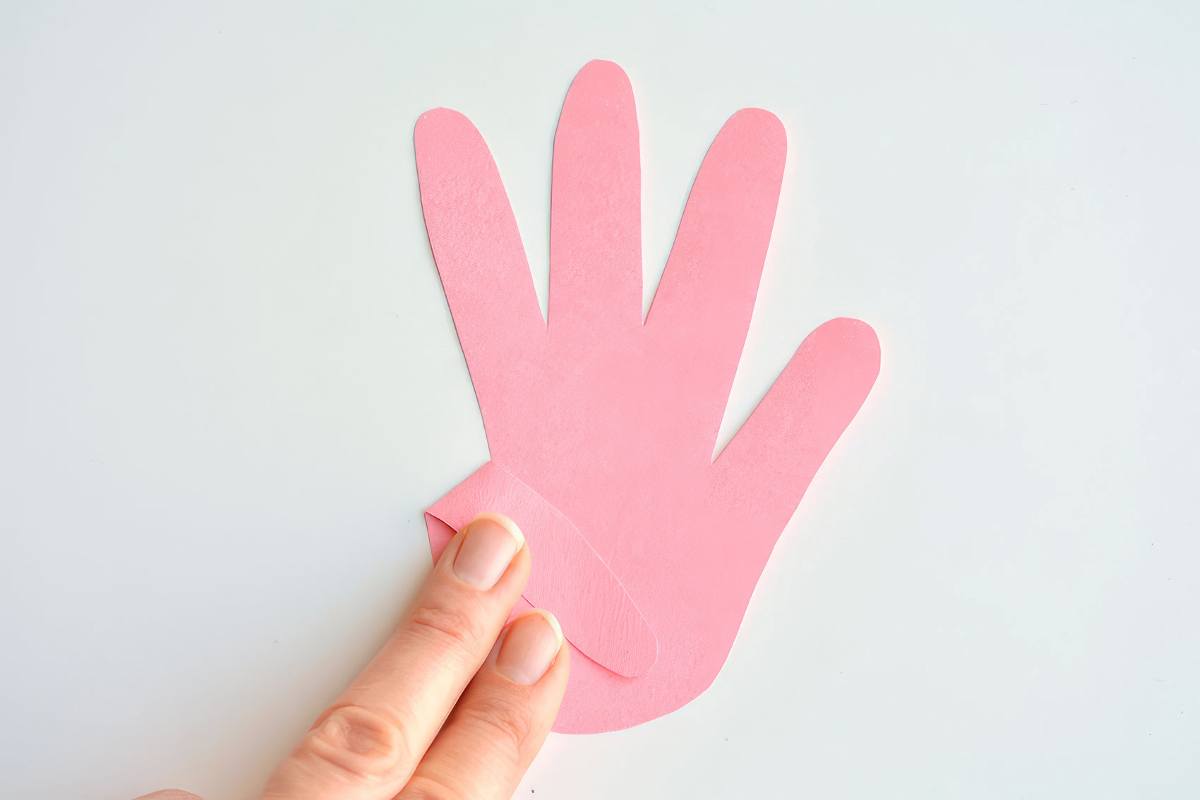
Step 6: Afterward, fold down the thumb towards the center to form the other bunny arm. Aim to fold them in a way that the two hands “touch” in the middle.
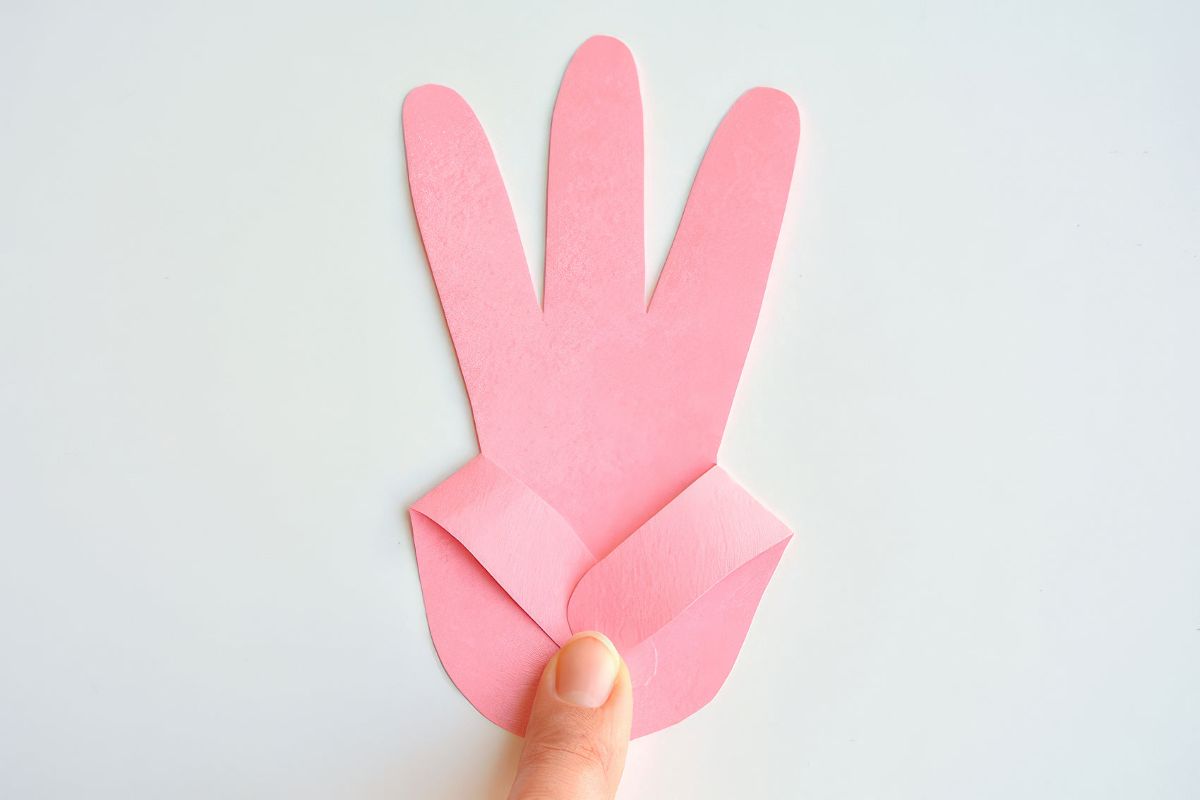
Step 7: Cut off the middle finger so you’re left with two finger “bunny ears”.
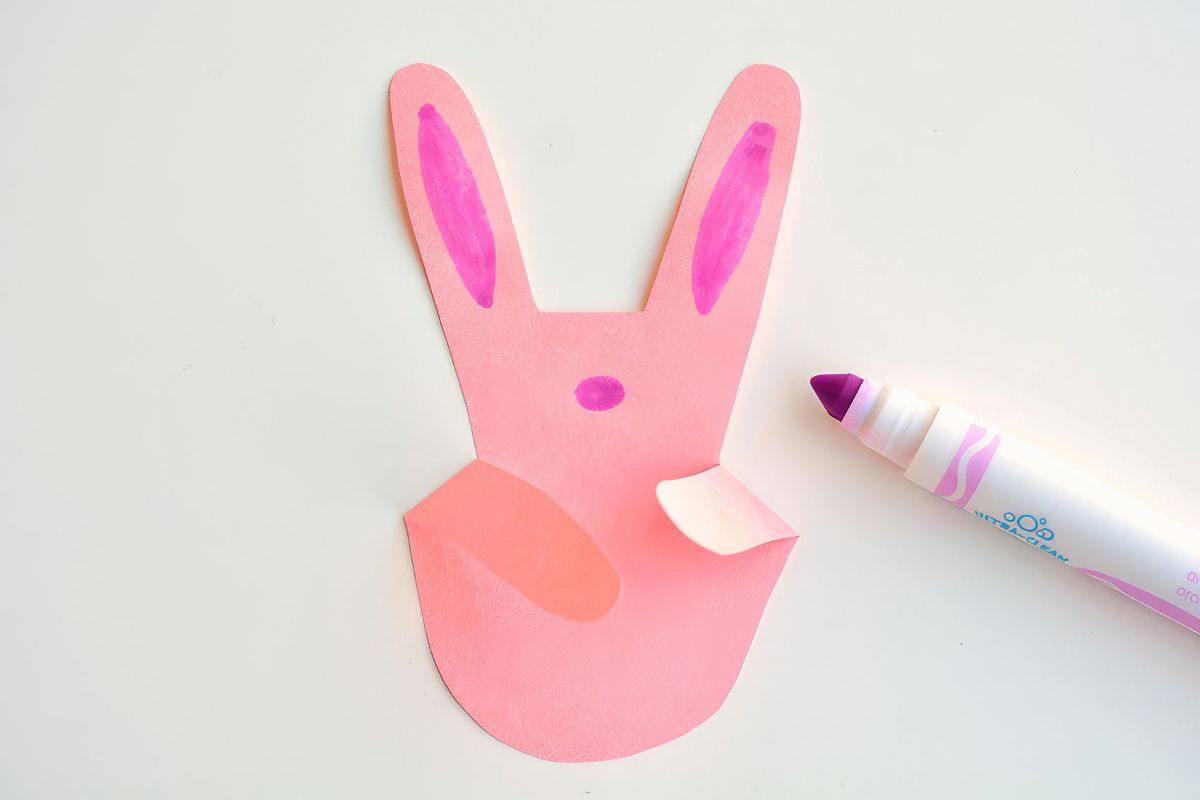
Step 8: Utilize a pink marker, pen, or pencil crayon to draw the pink sections of the ears. Then, draw an oval shape for the rabbit’s nose.
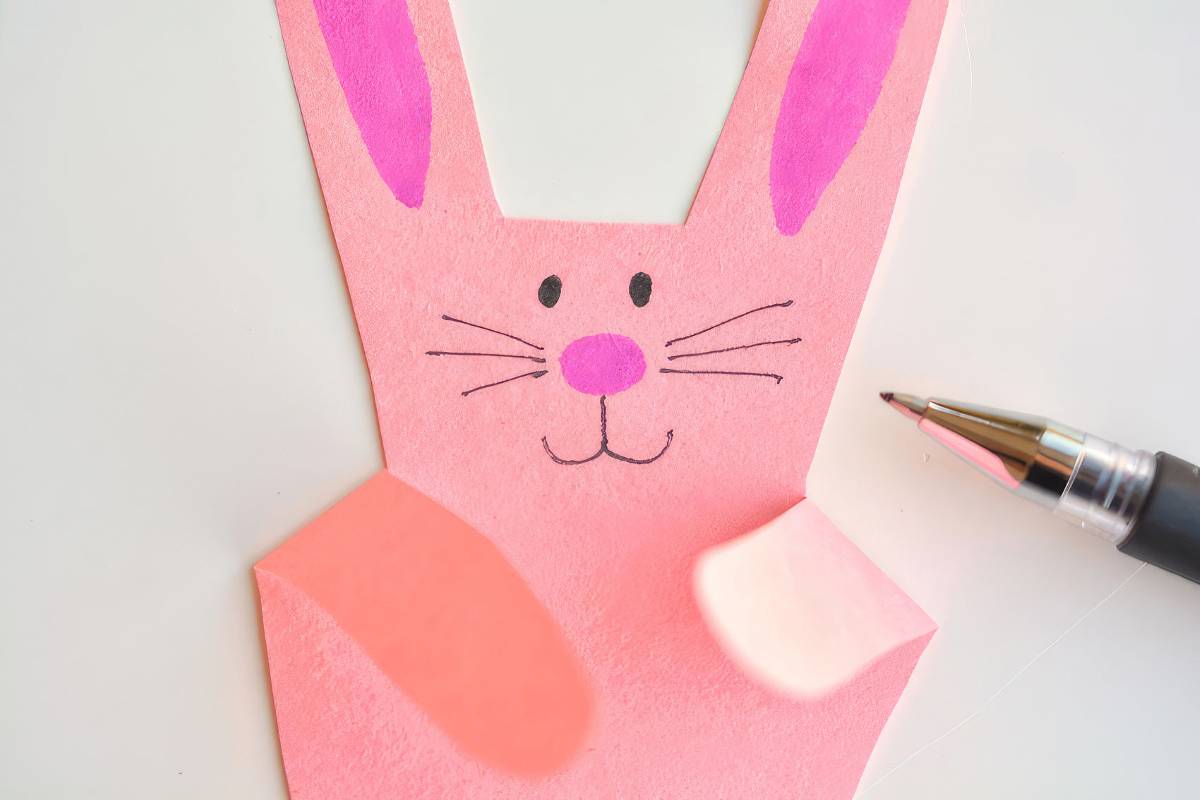
Step 9: With a black gel pen, regular pen, or marker, proceed to draw the remaining features of the face – including the eyes, whiskers, and mouth. Refer to the examples below for different face options.
Step 10: Finally, draw two small paws at the bottom of the handprint to depict the bunny’s feet.

Your paper bunny is complete. If you enjoyed this DIY tutorial, don’t forget to visit our Handicrafts blog for more creative tips and tricks.

Easy sticky chicken rice bowls
Easy to make DIY pressed flower suncatchers


